Slack Jira Integration
- bitband
- Anna Kabanova (Unlicensed)
- Anna Korniyenko (Unlicensed)
1.Slack Jira Overview
The Jira Slack Integration provides bi-directional communication between the Jira Cloud instance and the Slack.
You can find this app on the Atlassian Marketplace here: https://marketplace.atlassian.com/plugins/jiragitintegration/cloud/overview.
Any change, comment or update within Jira can be configured to notify to one or multiple slack channels.
A slack user can participate in a discussion around a Jira issue and that conversation is sent to Jira.
Notifications
The Jira Slack Integration addon allows you to create notifications at three levels within Jira. At a system level, a project level and an issue level.
System Notifications
System notification work at a system level meaning any notification set up here responds to events within the whole Jira system and include all projects and all issues. A user can create 1 or many notifications at a system level. System level notifications can be created or configured at the System Level administration screen.
Issue level notifications are shown here but can not be created here.
For more information please see Creating a System Notifications
Project Notifications
Project notifications work at a project level meaning any notification set up here responds to only events for that specific Jira project including all issue associated with the project. A user can create 1 or many notifications at a project level. Project level notifications can be created or configured at the Project Level Administration screen.
Issue level notifications are also shown and can be configured here.
For more information please see Creating a Project Notifications
Issue Notifications
Issue notifications work at an issue level meaning any notification set up here responds to only event within a specific issue. A user can create 1 or many notifications at a issue level.
Issues level notifications can be created or configured on an Jira Issue Page.
For more information please see Creating an Issue Notifications
Slack Slash commands
This add-on supports a variety of slash commands inside Slack. To get a list, inside Slack type "/jira ?" after connecting your Slack instance to this add-on.
For more information on this please see Slack Commands
2. Installation
2.1. Installation from Manage Addons
- Log into your Jira instance as an admin.
- Click the admin dropdown and choose Add-ons.
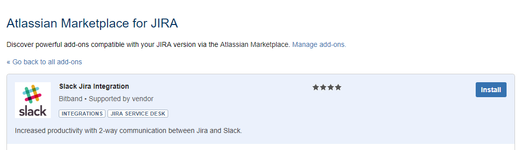
The Find new add-ons screen loads. - Find Slack Jira Integration by Bitband via search.
The appropriate add-on version appears in the search results. - Click Install.
- Confirm add-on installation by clicking Accept & install.
Now you're able to connect to Slack.
2.2. Installation from Atlassian Marketplace
Please note that only an Jira Administrator can Install this addon as this requires access to system preferences.
- Log into your Jira instance as an admin.
- Navigate to the Slack Jira Integration addon page and click on the “Get it now” button.
- If you have multiple Jira sites with your account select the site you wish to install the addon.
- Select the “Install” button to install the Slack Jira Integration.
- Follow the prompts to install this addon.
3. Connecting to Slack
It's HIGHLY recommended you create a dedicated Slack admin user that's solely used for connecting this app from Jira to Slack. If you use a Slack admin account that's actively used by someone they'll end up receiving some system notifications inside their Slack which could be annoying to their daily workflow.
Once you have installed the addon you will need to connect to your instance of Slack. Please note that only a Jira / Slack Administrator should do this connection, otherwise functionality in this app will be limited.
- Log into your Jira instance as an admin.
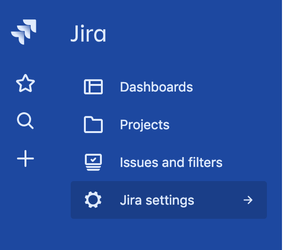
- From the Jira Dashboard click on Settings as shown below.
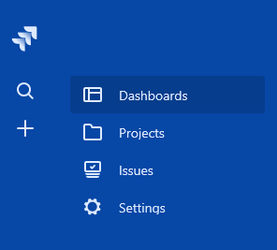
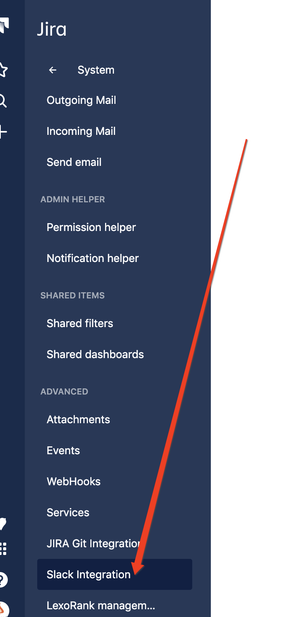
- Click on Add-ons → Manage add-ons and Find "Slack Integration" in the list of Add-ons. Select the Config button.
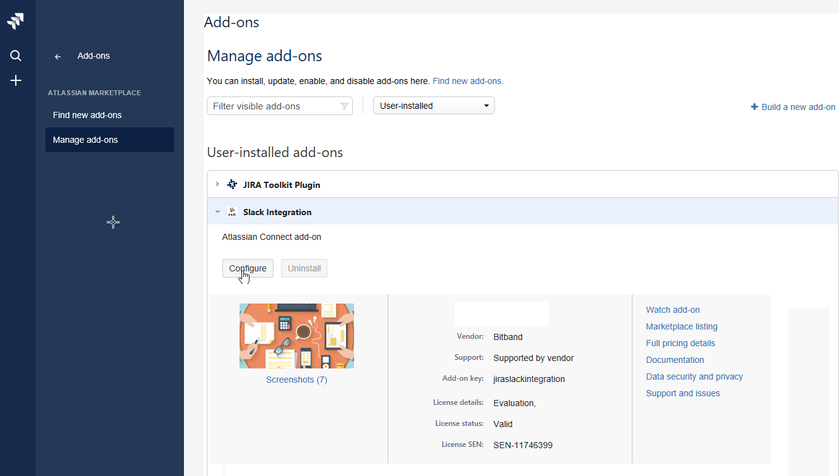
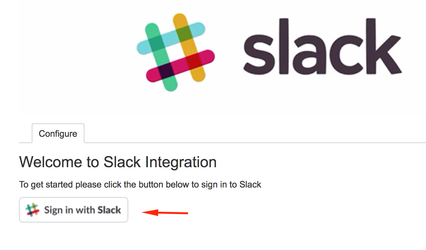
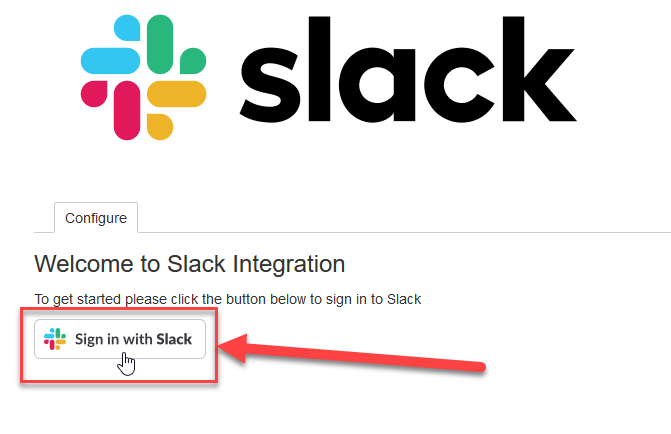
- Click on the "Sign in with Slack" button shown below and follow the prompt to select and login to your instance of Slack.
- Select appropriate Slack Team and Authorize.
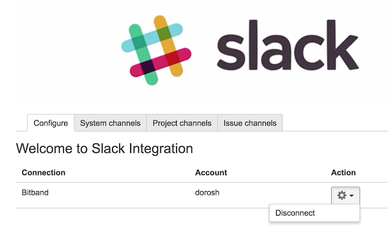
- Congratulations, now you’re able to use the Add-on. You can change your Slack account any time to any other account by disconnecting and reconnecting with a new account.
For more details check out this video:
4. Creating Notifications
You can create three levels of notifications that connect to a slack channel:
- System Notifications connecting to a Slack channel - provide event notifications for all Jira items and issues in all defined projects within your system.
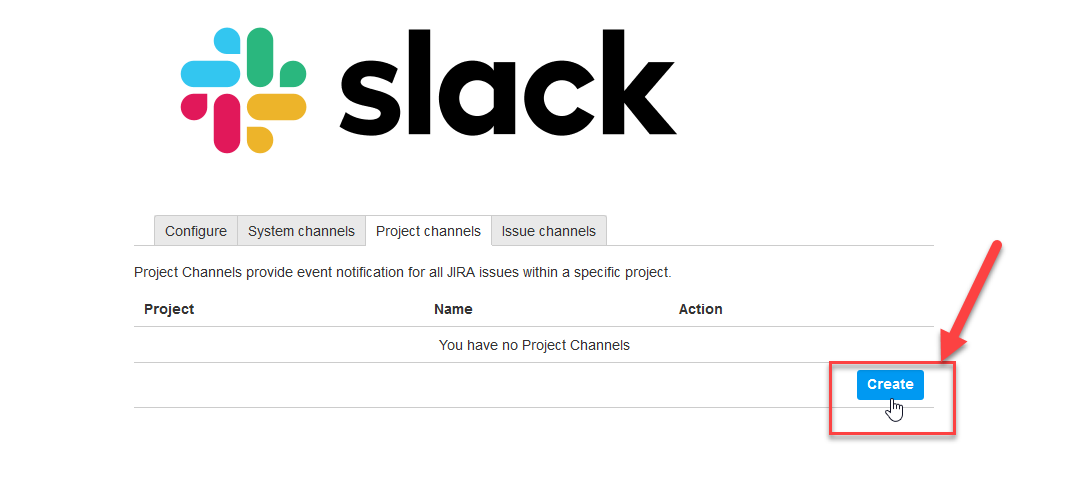
- Project Notifications connecting to a Slack channel - provide event notification for all Jira items and issues within a specific project.
- Issue Notifications connecting to a Slack channel - provide event notification within a specific Jira issue.
4.1. Creating a System Notification for Slack
You can create a notification at a System level that connects to one or more slack channels. Please note that only an Jira Administrator can do this as this requires access to system preferences.
- Log into your Jira instance as an admin
- Open Slack Integration System channels Preferences
Add-ons → Manage add-ons → Slack Integration → System channels - Select “Create” as shown below

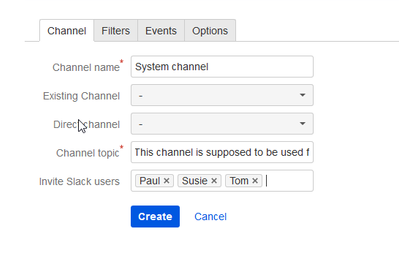
4.1.1. Channel tab
The Channel tab allows you to configure which Slack Channel you wish to direct notifications. You can send a notification to a new channel, an existing channel, or directly to a slack user.
- Add a channel name and channel topic. You can also optionally invite slack users to this channel as shown below.
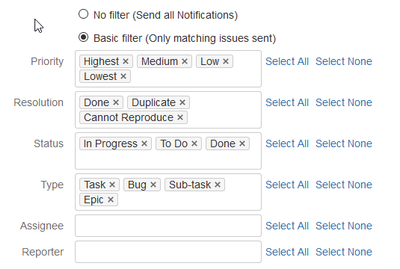
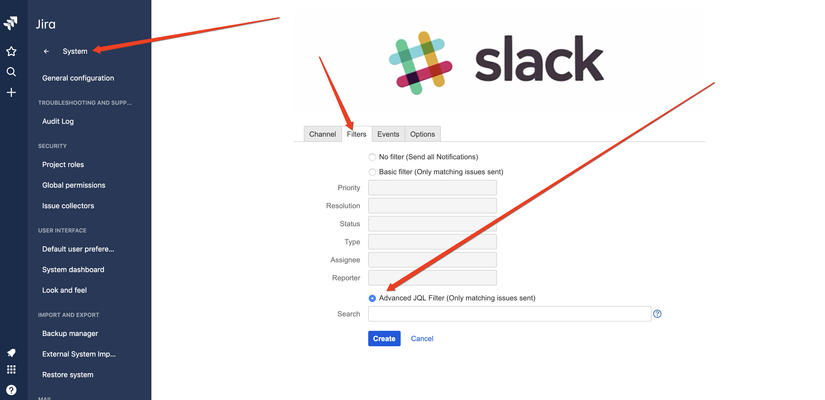
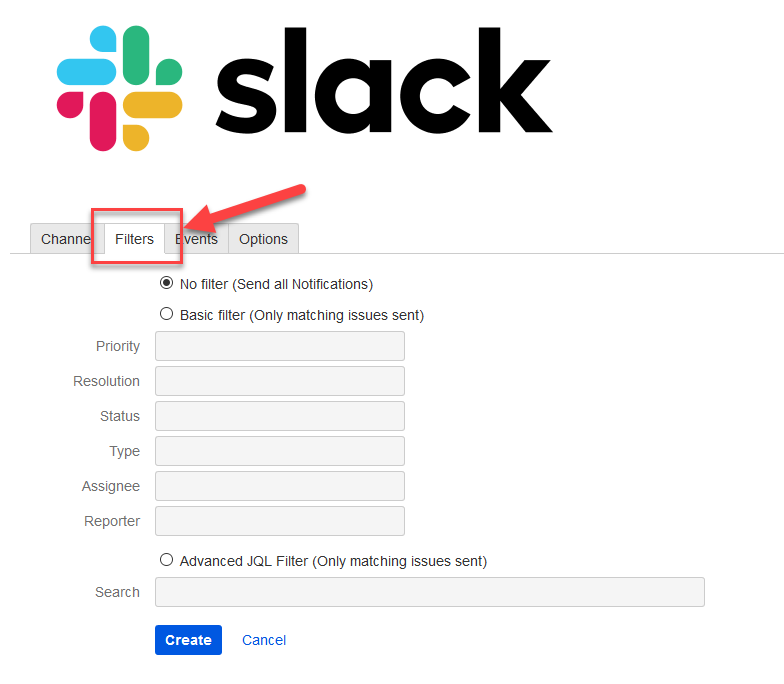
4.1.2. Filters tab
The filters tab allows you to filter out which type of events you require.
Select one of the options:
- No filter (all notifications will be sent)
- Basic filter (you can create your own filter)
- Advanced filter (JQL filter)

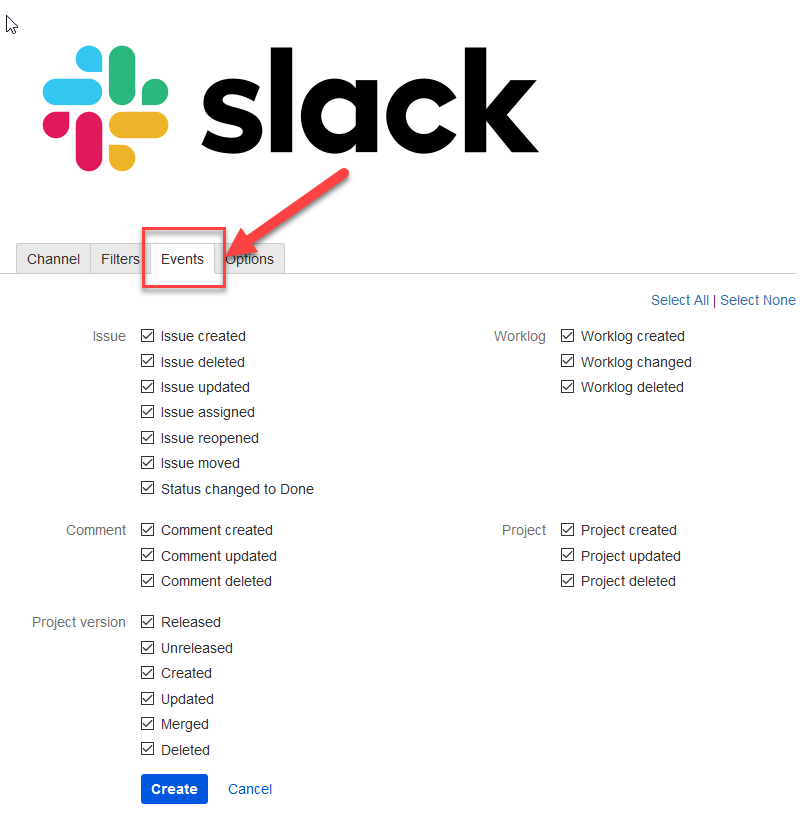
4.1.3. Events tab
The Events tab allows you to monitor which events you wish to turn on notifications.
By default all values are selected.

4.1.4. Options tab
The option tab allows you to force all notifications to this channel regardless of any settings at the project or issue level. By default option is deselected.
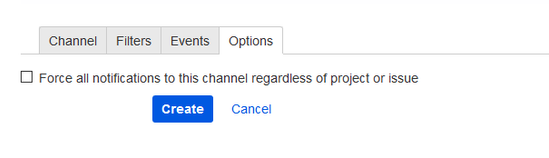
4. Click Save to create System channel.
4.2. Creating a Project Notification for Slack
You can create a notification at a Project level that connects to one or more slack channels.
- From the Jira Dashboard click on Project and select your desired Project.
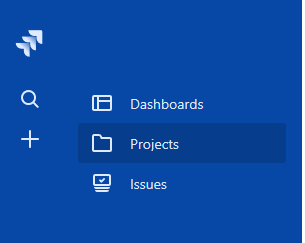
- From the list of menu options select "Slack Integration" as shown below.
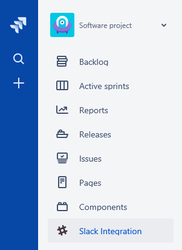
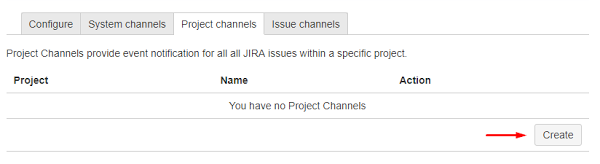
- Select “Create” as shown below
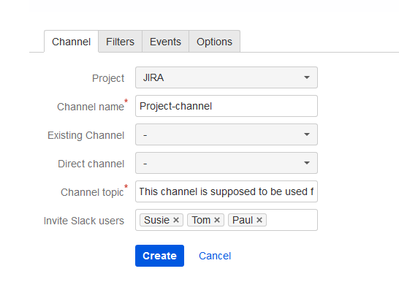
4.2.1. Channel Tab
The Channel tab allows you to configure which Slack Channel you wish to direct notifications. You can send a notification to a new channel, an existing channel, or directly to a slack user.
- Select a project, add one of (1) Channel name (2) Existing channel or (3) Direct Channel, and Channel topic. You can also optionally invite slack users to this channel as shown below.
4.2.2. Filters tab
The filters tab allows you to filter out which type of events you require.
Select only one of the following options:
- No filter (all notifications will be sent)
- Basic filter (you can create your own filter)
- Advanced filter (JQL filter)

4.2.3. Events tab
The Events tab allows you to monitor which events you wish to turn on notifications.
By default all values are selected.

4.2.4. Options tab
The option tab allows you to remove notifications to System channels and override any issue level notifications set.
By default options are deselected.
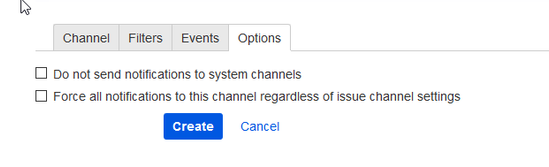
4. Click Save to create Project channel.
4.3. Creating an Issue Notification for Slack
You can create a notification at an issue level that connects to one or more slack channels.
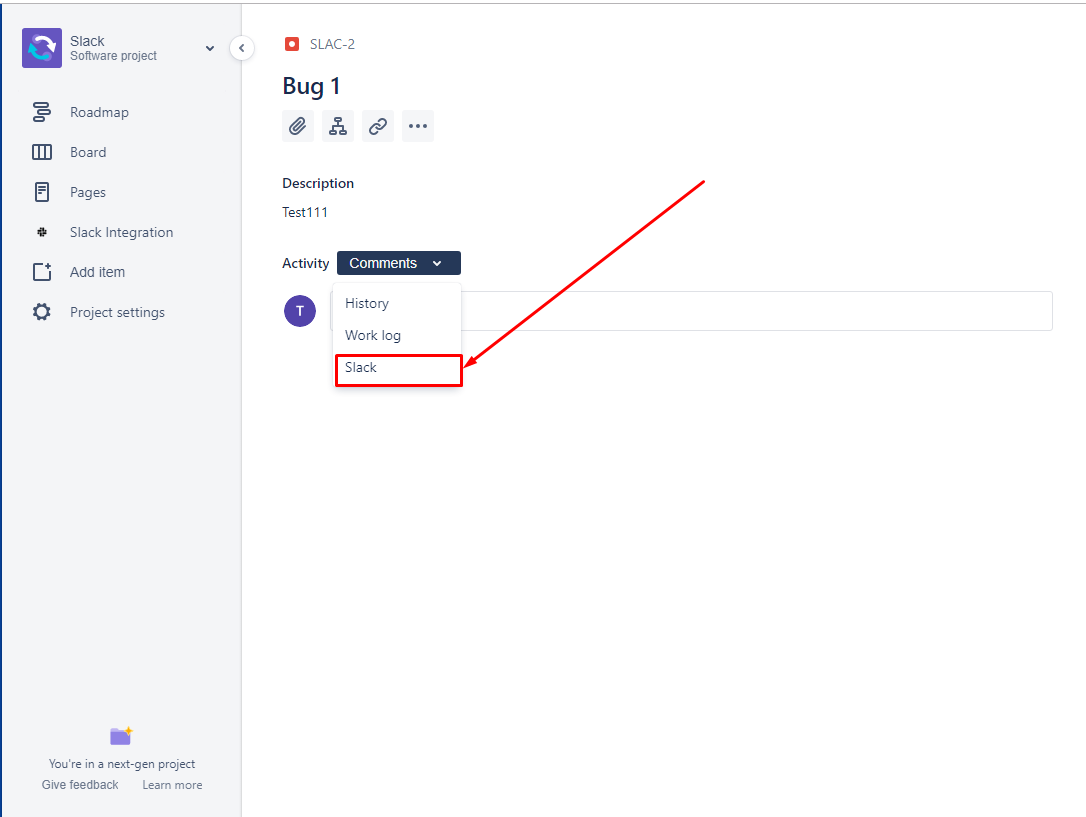
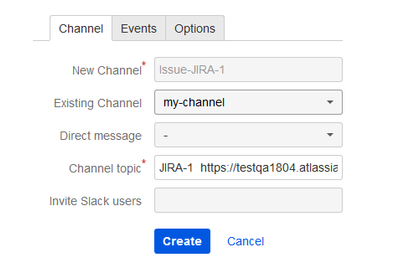
- Open any Jira item and select "create" in the Slack Integration section as shown below.
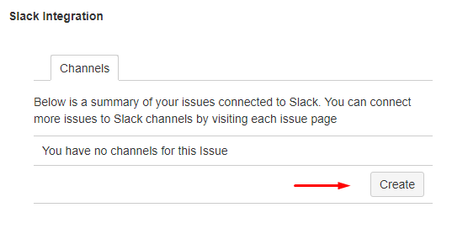
2. Add a channel name and channel topic. You can also optionally invite slack users to this channel as shown below. 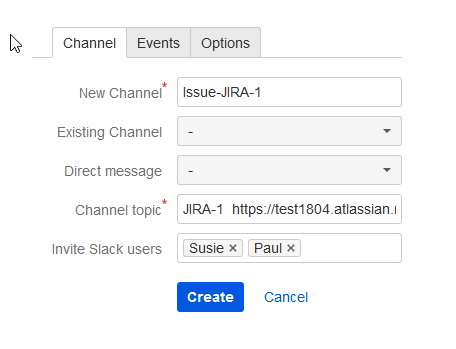
4.3.1. Events tab
The Events tab allows you to monitor which events you wish to turn on notifications.
By default all values are selected.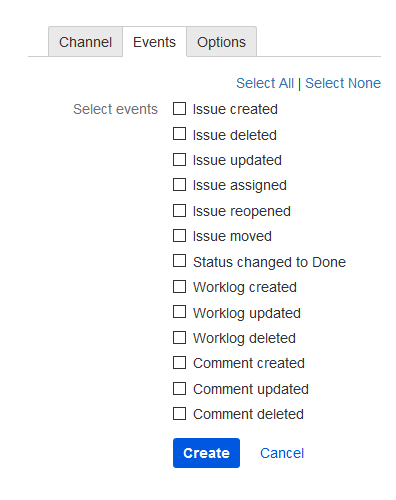
4.3.2. Options tab
The option tab allows you to remove notifications to Project and System channels.
By default option is deselected.
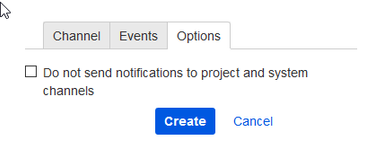
3. Click Save to create Issue channel.
4.4. Sending Notifications to Existing Channel
While creating any type of Notification channel you can send notifications to existing channel in Slack.
Example for issue notifications:
- Open any Jira item and select "Create" in the Slack Integration section.
- Click on the Existing channel drop-down list and select any Slack channel. Fill in the channel topic and change Events and Options tabs if needed
.
4.5. Sending notifications to individuals
While creating any type of Notification channel you can select to send notifications only to individuals in Slack.
Example for the issue notifications:
- Open any Jira item and select "create" in the Slack Integration section.
- Click on the Direct channel drop-down list and select any Slack user. Fill in the channel topic and change Events and Options tabs if needed.
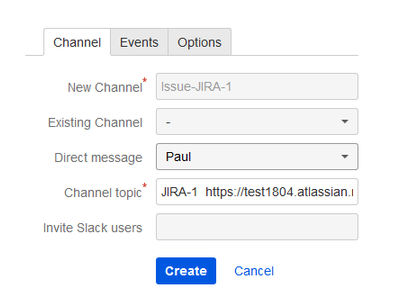
- Click Save to create Issue notifications that will be send only to the selected individual.
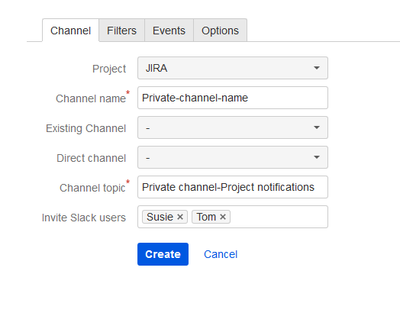
4.6. Sending notifications to private channels
You can send notifications to both public and private channels. Workflow is the same as for the public channels except for Channel name field. Please include recently created private Slack channel name in this field. For security reasons you will not find existing private channels listed in the Existing Channel drop down. You'll need to create a new private channel inside Slack and then add the name under Channel name.
This video shows how to create and connect a private channel at the Jira project level:
This video shows how to create and connect a private channel at the Jira issue level:
4.7. Using one channel for many notifications
You can send many notifications to one Slack channel. For example, all System, Project and Issue notifications can be send directly to one selected channel (public or private).
In case you would like to receive many notifications using one channel please include recently created Slack channel name in Channel name field while adding new notifications.
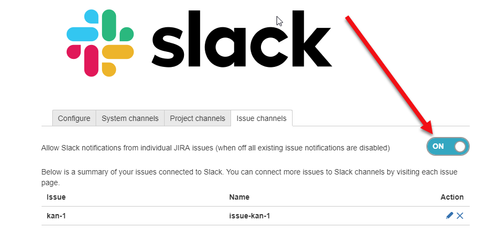
4.8. Turning off notifications on the issue page
You can turn off the Jira Slack Integration addon view on the issue page. You need to go to the issue tab and use the toggle button for turning it off. Issue configuration, notifications and any other screens inside issues are no longer be visible.
5. Slack Commands
The commands allow you to create, view and change Jira issue info via Slack channel.
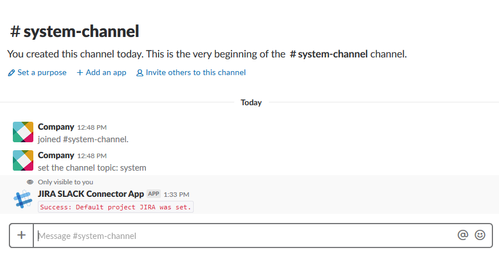
5.1. Setting Default Project
The command sets the default project that enable the work of Jira commands. You must have a project defined for issue related commands to work.
Command Usage /jira project <projectkey>
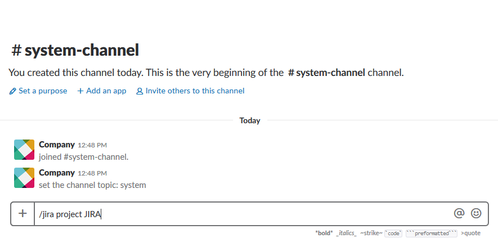
As response you receive the notification that the default project is set.
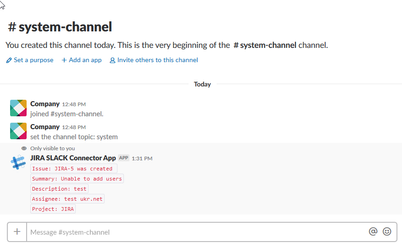
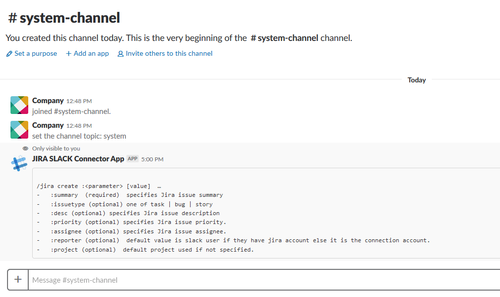
5.2. Create an issue
The command allows you to create an issue in Jira via the Slack channel.
Command Usage /jira create :<parameter> [value] ...
5.2.1. Parameters
:summary (required) specifies Jira issue summary
:issuetype (optional) one of valid issue types. task | bug | story If no issue type is selected default to task.
:desc (optional) specifies Jira issue description.
:priority (optional) specifies Jira issue priority. Must be a valid priority or error message states priority is not defined in Jira.
:assignee (optional) specifies Jira issue assignee. Must be a valid assignee or error message states assignee is not defined in Jira.
:reporter (optional) Default value is a current Slack user with appropriate Jira account. If reporter is selected, that must be a valid existing Jira account.
:project (optional) default project used if not specified.

As response you receive a notification that the issue is successfully created
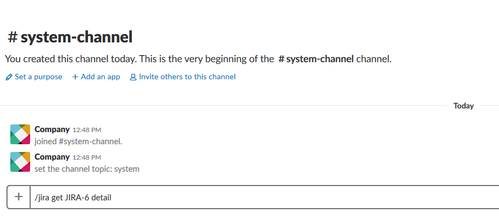
5.3. Get an issue
The command allows to get a short or detail information about an issue.
Command Usage /jira get <issuekey> [detail]
Issuekey - Any valid issue i.e. JIR-23
Detail - not required parameter,returns detailed info about Issue
By default you receive the following information: project, Issue #, summary, description, assignee.
If Detail is selected as an option, then you receive the following issue info: project, Issue #, summary, description, assignee, reporter, components, and status

5.4. Transition as Issue
The command allows to change a status of an issue.
Command Usage /jira transition <issuekey>
Issuekey - Any valid issue i.e. JIR-23
After sending a command you receive Slack buttons with statuses (To Do / In Progress / Done) that are available for current issue now.
![]()
After clicking a proper button you receive a notification that the issue has been transitioned.
![]()
5.5. Search issues
The command allows to search for a single issue or multiple issues using JQL.
Command Usage /jira search <JQL>
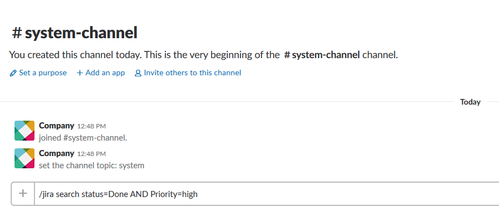
After you receive a list of issues and summary that match the JQL
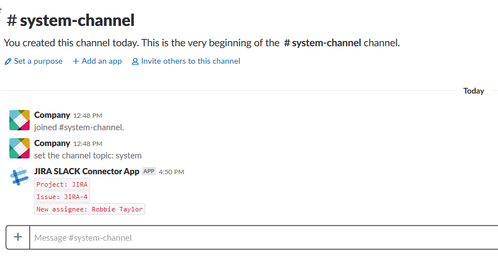
5.6. Assign an issue
The command allows to assign an issue to another Jira user or to yourself.
Command Usage /jira assign <issuekey>
Issuekey - Any valid issue i.e. JIR-23
You will see a Slack menu showing a list of valid users to assign the issue to.

After you receive Project, Issue and New Assignee
5.7. Help
The command returns a list of all valid commands and also the details about specific commands.
Command Usage
/jira ?
/jira help

To receive a detail help information about any valid command you can use the following command:
/jira <command>
For example, /jira create
6. FAQs
Below is a list of frequently asked questions about the Slack Jira Integration:
6.1. Is there a way to disable Jira update notifications in Slack channels?
Yes. Jira notifications are configured at the issue (ticket) level, project, or for the entire system (instance) of your Jira. Many of our user's set up rules for each project based on specific types of Jira issues and specific events for those issues they want to be notified about inside Jira. The Filter tab allows you to select which types of Jira issues inside a project (or your would instance) you want to send notifications. You can even use JQL to filter down to very specific types of issues. On the events tab you can select which types of activities (events) on a Jira issue you want to send a notification. So there's no need to have notifications for every issue and every event - you'll want to pick the things that really matter to your team.
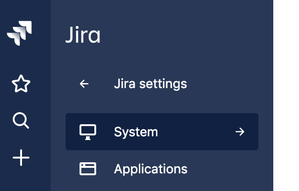
6.2. How do I find the System settings to control the Jira Slack Integration for my entire Jira instance?
Below are screenshots that should take you to the System settings:
6.3. Where do I find the advanced JQL Filter settings?
They are available at the System and Project level to have granular control over which Jira issues send notifications to Slack. For example, in the System settings menu you would find the JQL filter option here:
6.4. When I enter a new Jira issue, can I have it send that issue information to a new issue specific channel?
You can create notifications at the System or Project level to automatically send notifications to a specific Slack channel anytime new issues are created that meet the filter/event criteria you set. However, at this time you cannot automatically spawn a new Slack channel that's specific to that one new issue. You'll have to manually go into that Jira issue and use our app settings to connect to a new Slack channel. Fyi, we are adding this functionality and it will be available soon.
6.5. We run our own instance of Jira on one of our own servers. Is this Jira Slack Integration compatible with our Jira server?
Unfortunately, this integration is only available for Jira Cloud. We are considering building a Server version in the future.
6.6. I only found your Cloud hosting option. Do you have or plan to have support for the Data Center version of Jira?
It's on our roadmap, but not available at this time.
6.7. Can I hide this integration inside Jira issues? We would like to limit our user's ability to create new Slack Channels.
This is currently not available, but it's something currently under development.
6.8. Can I connect a Jira issue to an existing Slack channel?
Yes, when configuring the notifications type in the name of the Slack channel you would like the notifications sent to. You can also select private channels. Note, for private channels you'll have to have connected the app with an admin account that has access to send messages to private channels.
6.9. Event notifications (like creating an issue or a comment) are not being pushed to Slack. The rest of the app seems to be working, including creating channels and the Slack commands. What aren't notifications working?
There are two possibilities: permissions or configuration. Check that you used a Slack admin user when connecting the app to Slack. If you didn't, try disconnecting the app and re-connecting as an admin. After that check your notification configuration. You need to select which issues you want to include/exclude from notifications and what events you want to cause notifications. You can do this inside a Jira issue, at the project level, or system level. It's possible you aren't including any issues to send notifications.
6.10. Every time a Slack channel is created it's showing that I personally created it and I am invited to the channel. Why?
It's recommended you create a dedicated Slack admin user that's solely used for connecting this app from Jira to Slack. If you use a Slack admin account that's actively used by someone they'll end up receiving some system notifications inside their Slack which could be annoying to their daily workflow.
6.10. I setup the app, but I'm not getting any notifications in slack.. what should I do?
Make sure Slack is connected:
- Open the Slack Jira Integration apps
- If Slack is not connected, click the “Sign In” button and log in Slack
- Make sure that filters and events are configured correctly in the channels:
- Open the Slack Jira Integration apps
- Go to any channels
- Make sure filters, that you need, are enabled
- Make sure system and project channels are created:
- Open the Slack Jira Integration apps
- Go to system or project channel tab
- Make sure that system or project channel are created